


You can replace a ball valve with a few basic tools and some patience. Always turn off the water before you start. Safety matters, so check that your new valve matches the old one.
Tip: Take a picture of your old valve before you head to the store.
Preparation and Safety
Gather Tools and Valve
Before you start, grab all the tools you need. This makes the job smoother and helps you avoid last-minute trips to the store. Here’s a handy checklist for most copper, PVC, and PEX piping systems:
- Marker
- Copper tubing cutter
- Drill-driver
- Copper pipe deburring tool
- Tape measure
- PEX tubing cutter
- Wrench
- Adjustable wrench
- Flame-protecting cloth gloves
- Locking pliers
- Soldering torch
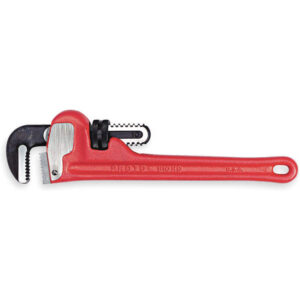
When you pick a new 볼 밸브, match the size to your existing pipe. Check the material—copper, PVC, or PEX—and make sure the connections are the same type (threaded, soldered, or compression). Look for trusted brands like NIBCO or Watts Water Technologies. These brands last a long time, sometimes 20 years or more.
Tip: Take your old valve or a photo with you to the store. This helps you get the right fit.
Shut Off and Drain Water
You must turn off the main water supply before you replace a ball valve. Open a faucet or use a drain to let out any water left in the pipes. This step keeps you dry and prevents spills. Double-check that the water is completely off before you move on.
- Shut off the main water supply.
- Drain the system.
- Make sure the water is off.
- Open faucets to release pressure.
Access Valve Area
Clear the area around the valve. Remove any insulation, coverings, or access panels. If your valve sits behind a wall, building codes say you need an access panel. This panel should be fire-resistant if required. You want enough space to work safely and see what you’re doing.
Here’s a quick look at common safety hazards:
| Safety Hazard | 설명 |
|---|---|
| Misalignment and Improper Installation | Misalignment can cause stress on internal components, leading to premature wear, leaks, or failure. |
| Sealing Issues and Valve Seat Damage | Degradation of seals and valve seats can lead to leaks or loss of valve function. |
| External Factors: Temperature and Pressure Extremes | Extreme conditions can cause materials to degrade or malfunction, leading to valve failure. |
Take your time with these steps. Good prep means you’ll replace a ball valve safely and with less stress.
Replace a Ball Valve
Ready to tackle the heart of the project? You’re about to learn how to replace a ball valve step by step. Let’s break it down so you feel confident every time you pick up a wrench.
Remove Old Valve
First, you need to get the old valve out of the way. The process depends on your pipe type. Here’s how you can do it:
- Copper Pipes
- If you have a sweat valve, grab your pliers and hold the valve steady. Loosen the nut and unscrew the stem. Remove the washer and let any leftover water drain. Use a torch to heat the valve body until you can twist and pull it off the copper tubing.
- For solder-type valves, sand off the old solder. Cut the supply line with a pipe cutter and smooth out the edges. Heat the fitting with a propane torch, then twist the valve off with pliers.
- If it’s a compression-style valve, use two wrenches. Loosen the compression nut with one while holding the valve with the other. Remove the sleeve and nut. If the sleeve won’t budge, you might need to saw it off.
- For thread-type valves, hold the pipe with a pipe wrench and twist off the valve using an adjustable wrench.
- PVC and PEX Pipes
- Sometimes the valve feels stuck or tight. That can block water flow. Try a little lubrication to loosen things up. Be gentle so you don’t crack the pipe or damage the valve. If the valve still won’t move, you may need to cut it out with a pipe cutter or saw.
Tip: If you damage the pipe ends while you replace a ball valve, you can use repair fittings made from copper, plastic, stainless steel, or even service brass.
When you finish, set the old valve aside. Don’t toss it in the trash just yet. Check the table below for the best way to dispose of plumbing materials:
| Plumbing Material | Recommended Disposal Method |
|---|---|
| Copper Pipes and Fittings | Recycle at a recycling center; they may pay for the material. |
| Brass Valves and Fittings | Recycle at a recycling center; they may pay for the material. |
| PVC and ABS Pipes | Check local recycling center; if not accepted, dispose of in trash. |
| Lead Pipes and Fittings | Treat as hazardous waste; contact local hazardous waste facility. |
| Taps and Fixtures | Recycle or donate if in good condition. |
| Chemicals and Supplies | Dispose of at a hazardous waste facility. |
Prepare Pipe Ends
You want a clean, smooth surface before you install the new valve. This helps prevent leaks and makes the job easier.
- Use a wire brush or pipe cleaner to scrub the pipe ends.
- Wipe everything down with a clean cloth.
- Inspect for any damage or corrosion.
- Make sure the pipe ends are straight and parallel. This keeps the seal tight.
- Remove any old sealant, dirt, or debris.
- Open and close the new ball valve a few times to check that it works smoothly.
Note: If you see any cracks or rough spots, fix them before you continue. You can use repair fittings made from copper, plastic, or stainless steel if needed.
Install New Ball Valve
Now you’re ready to install the new valve. The steps change a little depending on your pipe type, but the basics stay the same.
- Inspect the ball valve ports and seating surfaces. Make sure they’re clean and free of debris.
- Operate the valve from fully open to fully closed to check for smooth movement.
- For copper, CPVC, PEX, or PE-RT pipes, make sure the ends are square cut, clean, and free of burrs.
- For copper pipes, use steel wool or emery cloth to polish the ends.
- Slide the pipe through the compression nut and sleeve until it hits the stop.
- For PEX or PE-RT pipes, insert support inserts to keep the pipe shape for compression connections.
- Tighten the compression nut by hand until it’s finger tight. Then use a wrench for another half to three-quarters turn. Check for leaks after each adjustment.
- Repeat these steps on the other side. Make sure there’s no stress on the valve.
- Support the valve and pipes so nothing bends or strains.
Callout: Always double-check that the new valve matches your pipe type and size before you replace a ball valve.
Test for Leaks
You’ve installed the new valve. Now it’s time to make sure everything is watertight. Here’s how you can test for leaks:
- Seal both ends of the valve. Pressurize the system to 1.5 times its rated pressure. Look for bubbles in water or soapy water around the valve.
- Open the valve and pressurize one end. Check for seepage from the other end.
- Wrap test paper around the stem-body joint. If the paper gets wet, you have a leak.
- Listen for hissing sounds. That can mean a small leak.
- If you have an ultrasonic detector, use it to find tiny leaks.
- Preheat the valve if you’re working in cold weather. This helps avoid false readings.
Tip: Don’t use too much pressure during testing. That can damage the valve. Make sure your test media matches the water or fluid you’ll use in the system.
Most of the time, you won’t need extra repairs. Only about 2-5% of ball valves need retesting after installation. If you spot a leak, tighten the connections or replace the faulty part. You’re now ready to replace a ball valve with confidence!
You just learned how to replace a ball valve step by step. Careful prep, cleaning, and leak testing make your repair last. If you spot leaks, rust, or trouble turning the valve, call a plumber. Good planning saves money—DIY costs less than hiring a pro. Routine checks keep your plumbing strong.
Source:Electrical and plumbing hacks
자주 묻는 질문
How long does it take to replace a ball valve?
You can finish most jobs in 30 to 60 minutes. If you run into problems, it might take a little longer.
Can you reuse old fittings when installing a new ball valve?
You should use new fittings for the best seal. Old fittings can leak or break. New parts help your repair last longer.
What if the new ball valve still leaks after installation?
- Tighten the connections a bit more.
- If it still leaks, you may need to remove the valve and check for damage or debris.

